

Once you receive your Hair Extensions: In-Home Care Kit, be sure to review the following instructions before beginning your in-home service.
We have broken your specific service into 5-Steps. Below we have included step-by-step instructions, and a links to a video tutorial for each step.
Here are a few tips:
- If you would like to watch all videos back to back you can visit our Hair Extension Playlist.
- Before performing your service be sure to watch all videos and print out and review the step-by-step instructions.
- To make your removal easier it is recommended that you wait an additional week or two past your normal service time.
- Having an extra set of hands will greatly help – consider asking a friend, family member or aid to assist you.
- Be sure to schedule at least 1-hour of uninterrupted time for your in-home service.
- We have provided you with a Personal Attachment Diagram in your kit. This is very important during the removal step
- Remember, be patient with this process and with yourself.
We truly appreciate your patience and understanding during a very challenging time, and we truly thank you for continuing to trust us with your hair & scalp needs!
Step 1. What Home Supplies Will You Need?
Before beginning It is important that you gather the following home supplies to assist you with your In-Home Hair Care Service. Additionally, our Beautiful Hair Products will be essential to your in-home service. If you do not already have these 5 products, we would suggest that you order them as soon as possible. For reference we have Your Complete Maintenance Guide and Maintenance Video Tutorial available.
Step 2. What’s Included In Your Kit?
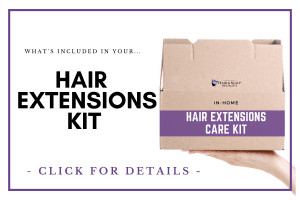
Each In-Home Hair Care Kit comes with all the necessary professional products we use during your in-center service. These products are designed to assist you with removing your hair extensions and cleaning your growing hair of any excess bond and adhesive .
Step 3. Prepare For Removing Your Hair Extensions
Before beginning your in-home removal, it is key to prepare for the removal process. To make your removal easier it is recommended that you wait an additional week or two past your normal service time. Having an extra set of hands will greatly help – consider asking a friend, family member or aid to assist you.
Step 4. How To Remove Your Hair Extensions
Be sure to refer to your Personal Attachment Guide for each hair extension line as the remover that is used could be different for each line and in some cases both removers may be needed for the same line. Video #1 is for RED dot remover. Video #2 is for Green DOT remover.
Be sure to set aside uninterrupted time for your removal. Remember more remover is not better and will NOT release your hair addition faster. MOST IMPORTANTLY be patient with yourself as you go through the following removal steps
Step 5. How To Clean Your Hair & Scalp
Now that you have removed your hair extensions it is important to remove excess bond and adhesive from your growing hair and scalp.